Recipe For Making Your Own Peanut Butter

>> Friday, February 13, 2009

With all the food scares we keep reading about, it’s beginning to look like making all of our own food is becoming more and more necessary. I’m developing a recipe file of homemade foods and this one just got added. Hope you enjoy.

I love peanut butter and although the latest recall doesn’t affect jars of it, my wife and I are getting a little leery of buying any processed foods. I used to believe that food processors would do whatever it takes to protect the highest quality and safety of their food products (without lying) but after reading this we’ve lost our faith. Boy, what a rude awakening we have gone through.

Organic peanut butter is expensive so we don’t buy it very often. Peanuts are not nuts, they are legumes and their use in peanut butter often produces a high fat, high sugar food that is addictively tasty but not good for your health. By making your own, genuinely nut-based nut butters you could eat better, save money and know exactly how your food has been processed.

This recipe is good for any kind of nutmeat, such as almonds, brazil nuts, cashews, hazelnuts, macadamias, pecans, pistachios or walnuts. There is also tips for roasting and sweetening the nuts.

Read more...

Update on Radish and Lettuce

>> Thursday, February 12, 2009

These seeds were started on Jan 25th, so that makes them about 18 days old. They are coming along quite nicely.

Only six of the eight lettuce seeds sprouted but thats okay. I’ll start some more in a couple of days, the suggestion is to start every two weeks.


Radish Helios Yellow sprouted only four out of twelve, while the Radish Purple Plum sprouted eight out of twelve. A bit disappointing. But I’m going to start a few more in a few days. The string in the photo is used to separate the two types of radish.

Lettuce and Radish like the temperature to be a bit on the cool side and the room where these are growing is kept at 66F. This is, as far as I know, a pretty good temperature.

The only thing that I can think of that might have caused the poor germination rate is the soil I used. I didn’t use a seed starting medium, opting instead for regular potting soil. I figured if they could grow so well out in heavier soil of the garden they should do fine in potting soil.

Hopefully the second planting will turn out better.

Radish should be edible size in another 10-15 days and the lettuce will be ready in about 30 days.

Read more...

Winter Sowing for the First Time

>> Sunday, February 1, 2009

This year will be the first time I do the winter sowing thing. I first learned of it last year from Kylee of Our Little Acre and have been itching to try it ever since.

I was in the process of picking up some pointers and stumbled upon the iVillage Garden Web Forums on Winter Sowing when I was reminded how important it is to thoroughly wet your soil before putting it into containers.

When I first began starting seeds indoors I learned this lesson after seeing all of my seeds and soil go floating off without any regard as to where it was all supposed to stay. If you have had the same problem you know what a complete mess you can end up with. Plus, it makes you feel like a total rookie.

Anyway, to prevent any future embarrassing moments I quickly realized that wetting the soil before I put it into the peat pots or starting trays is the way to go. And winter sowing is no different. I used any container large enough to hold most if not all of the soil I needed. I now use one of those Homer’s 5-gallon buckets from Home Depot. These are very versatile and easy to use. Start by pouring about an inch of water in it and then pour about 6-8” of potting mix. Thoroughly mix the stuff together with a trowel, or by hand if you feel like being a real gardening geek like me, You know you’re going to make a mess anyway, so why not enjoy it.

Then I pour in a little more potting mix and add a little more water, mix thoroughly and repeat until I have enough very damp mix for my containers. About the consistency of mud pies works great. Not those lame watery, runny pies, but something you would be proud to serve at a tea party. What can I say, I grew up with four sisters, so I know mud pies.

This method works so much better than my first experience.

The thing about winter sowing that so intrigues me is that the containers you use can be anything that was once used for something else. This so perfectly matches my philosophy of recycle and re-use. Milk jugs, two-liter soda bottles, salad take-out containers, and big plastic jars (the kind pretzels come in at warehouse clubs) are all popular winter sowing containers. The only real requirement is that the container be large enough to hold at least three inches of soil and it must have head room for the growing plants. Drainage holes should be cut into the bottom, and air transpiration holes or slits should be cut into the top of the container.

In order to get the plants in the containers you have to cut the containers to about half way making a top and a bottom. You can make them deeper but you really don’t need that much soil. The one thing I am not completely set on is the hinge. Some people say they cut the container completely through while others leave top and bottom attached to create a hinge. Why do you need to hinge? Maybe it’s because it would be easier to tape it all together if they are not two separate parts. I really haven’t discovered any other reason.

Just like when starting trays of plants, you can either place peat pots or other small containers within each larger container or you can just fill the container with soil and set your seeds. I found these square peat pots fits four perfectly in a gallon milk jugs. However you want to do it, once you have the soil and seeds or containers and seeds in place, tape the top portion to the bottom to make the container whole again. Save the lids in case you want to prevent rain or snow melt from getting inside, you don’t want to over-water everything.

When setting the containers outside, don’t place them under awnings or overhangs where melting snow might over-water them. When spring rains arrive you will want to again protect them from being over-watered. Condensation build-up inside is a good thing. If there is no condensation, it either means that you have too many transpiration holes (tape over some of them if this is the case) or your soil is drying out. If the soil is drying out, use a spray bottle to gently mist the inside of the container through the top opening, you don’t want to disturb seed placement. As spring arrives, and the air warms up, your transpiration holes should be made bigger and bigger, until you remove the top of your container entirely. This is the winter sowing way to “harden off” your plants. After they are hardened off, simply plant your transplants out in the garden.

The whole thing makes sense when you realize that mother nature sprouts seeds outdoors without the help of fluorescent tubes and heating mats and seedling trays. The seeds will sprout when all the conditions are just right.

If the jugs start drying out, set them in a larger container of water and wait until the soil surface begins to get wet, a bit time consuming, especially if you have a lot of containers. I have seen suggestions of using a kiddie pool, but who fills one these with water in the winter? Maybe I’m missing something, but I’m betting on using the kitchen sink or bath tub. If you have a garden hose attachment with a mister nozzle, smooth gentle spray, then you can use that as long as it fits into the top of the container. Of course, I’m picturing a milk jug here.

In this first experiment I started Thunbergia White-eyed Susie, Sweet Pea Winter flowering Navy Blue and Mammoth Mix, Rosemary, and Marigold Cracker Jack Mix. I will add more later as I find more containers, I have already put the word out to neighbors and friends. If they don’t start their own seeds this way I should have more soon.

I found listings of plants that can be winter sown and honestly the list of seeds that are NOT good candidates is much shorter. The seeds that would probably not work as well would be those seeds that start easily by direct sowing, such as beans and peas, and those that don’t transplant well, such as root crops.

Some of the seeds I am using this year are leftover from last year but over my years of gardening experience I have seen many plant seedlings that I would have bet would never re-sprout or volunteer themselves in the strangest places, some far away from where they grew the previous year. So not much surprises me any more. My advice is to experiment. If you aren't sure something will winter sow well, just put a few seeds in a container and see what happens. What do you have to lose?

In reading about how others are doing this I found that some people set their containers outside a couple of weeks ago, in zone 5! Yikes! I really need to get this thing going.

I also started some other seedlings the conventional way because we want these for eating sooner. Radishes Helios Yellow and Purple Plum, Lettuce Little Gem, Chives Garlic, and Basil.

Next on my checklist of things to do before spring is to buy more seeds, get more containers, widen my current plots, build trellises. You see, it’s always something.

Read more...

Starting is Simple, Keeping it Going is the Challenge

>> Friday, January 30, 2009

As the saying goes: “There is no better time to start than the present”. And so it is with home gardening. Many home gardeners grow their own food out of a love of just doing it, some others do it for the peace of mind that comes with knowing the food they take from their garden is not tainted with pesticides and chemical fertilizers. And of course there is the freshness that can come only from picking from your garden and having it on your dinner table the same day.

With our economy going the way it is, tightening everyone’s purse strings typically means more people are going to join us in the gardening world. If this is something you have never done, then the startup can be a bit overwhelming. I think back to when I grew my first vegetable, it was in a typically small space where some previous renter had previously grown something, so I was fortunate, and very grateful, that the soil had already been used for something other than grass. The one thing I did not know for certain was if the previous tenant used chemicals. I set aside my fears by reasoning that up until that point in my life I probably had already been exposed to chemicals in my food so worrying about what might have been was not going to stop me from planting. I knew I wasn’t going to add any chemicals, so off I went.

I was very much like every beginning gardener in that I chose tomatoes as my first crop. And as is typical of a first time gardener, I planted too many. Needless to say the neighborhood had fresh tomatoes for a time. I just know, as I write this, realized that even that long ago, just as today, very few of my neighbors had a home garden. But, as I mentioned previously, that will probably change. I do hope so.

I also grew some strawberries that first year. The crop that was produced exceeded my expectations and I was ecstatic at the sweet juicy berries we picked from those first plants. Ecstatic over the bounty of the strawberries and the tomatoes and ecstatic that I was actually able to succeed. That was a great confidence booster.

Experience, I have found, learned from your own mistakes and successes, will provide you with far better lessons than just reading about others’ mis-adventures.

The best way to start is to put something in the ground, even if it is unproductive the roots from that first growth will provide a starting point for bringing soil nutrients locked below the surface up to where future plants can take advantage of them. The most miraculous thing I have learned from gardening is that a plot of ground that seemingly will never support anything, such as hard packed clay, will grow healthy plants that will produce a monstrous harvest as long as you feed the soil.

Soil will quickly come to life with worms and microbes simply by tilling compost into it. By keeping the soil cool in the summer with mulch and maintaining a steady, somewhat constant temperature through winter, also with mulch, you will already win over half the battle of maintaining a healthy and thriving garden.

Worms work to aerate the soil and breakdown large chunks of compost into smaller ones that serve to keep the soil loose to allow air and water to pass through. This ‘looseness’ of the soil, called friability, will also aid plant roots in their search for nutrients. Worms and microbes basically keep the plot refreshed through their constant churning. As long as you feed them they will be there for you. The thing you don’t want to do goes against what may at first seem natural. You don’t want to over-till the soil. It is more beneficial to ‘work’ compost into the top few inches of soil with a pitch fork by gently turning over the soil. A mechanical tiller will tend to cut up the soil too fine and unfortunately cut up the worms as well.

Even if you will not live in the house you are in for very long, starting a garden will prepare the soil for the next person. Perhaps this will be just the encouragement that next person needs to grow their own food. Imagine for a moment if everyone was to do this with their current yard, before too long, grass won’t be taking up so much acreage on this planet, there will be a decrease in the amount of chemical fertilizers used to feed the lawn, and you will have helped in progressing the natural evolution toward a more organic world. After all, there is far more residential property than commercial property so each of us, when we start a home garden, will be increasing the total amount of farm land. Plus, every little bit you do adds to your knowledge base for when you do have space to grow that dream garden. Every new garden plot helps the global community.

Then, if you would post your results to your very own blog, or leave comments on someone else’s blog describing your experiences, both good and bad, you would be adding to the world’s knowledge pool and that is always much appreciated by the next beginner. Perhaps you will learn of a hidden talent that you can specialize in.

You really do not require a huge farm to grow everything you need. You can grow a surprising amount of plants in a very small space. If you have a neighbor who has a garden, ask if you can offer to help weeding or planting. You will gain valuable advice and perhaps even a few plant starts to get your own garden going. Gardeners are an endless supply of knowledge, some of which you cannot learn from books. And I have never met a gardener who does not want to talk about their garden or share advice.

Dig a hole in the ground, fill it in with store bought garden soil (compost can come later), stick a plant in the soil, feed it with non-synthetic fertilizer and watch it grow. You may not get a huge harvest from this first planting but, like every new undertaking, baby steps count. You will gain confidence to try something bigger next year.

If you don’t have a yard, use a container. Many plants do great in containers, you just need to feed and water them more often and make sure the container has good drainage.

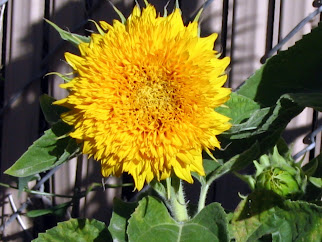
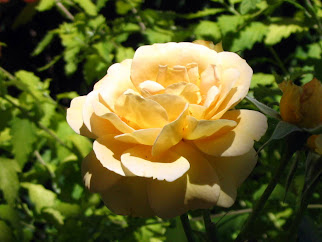
Also, don’t be afraid to plant vegetables among your flowers. The added dimension and diversity will benefit both types of plants and prevent any bare spots that would otherwise invite weeds.

For more advanced tips on starting and maintaining a garden plot, see here.

I am willing to bet that once you gain a little experience you will want to continue growing your own food, even after the economy gets back on its feet and it is no longer a ‘necessity’ to grow your own food. So, if you do find you enjoy maintaining a garden maybe keeping it going won’t be such a challenge after all.

Read more...

Started first seeds indoors

>> Sunday, January 25, 2009

I just couldn’t wait, so I started some radishes. These are not going to go outside, though.

These radishes are part of my recent order from John Scheepers, Purple Plum and Helios Yellow.

I started 15-18 each in a rotisserie chicken container from Costco. The coffee cup was used to sprinkle water on the soil, I closed the small opening in the lid so just a little water would come out. I always have a problem with pouring water on the seedlings and washing everything into one corner, so this worked out great.

The Purple Plum radish will be ready in 25-30 days, while the Helios Yellow won’t be ready fro 30-35 days.

I’m so excited. Woo Hoo!

Read more...

© 2007 -2011 - Utah Valley Gardens - All photos and content copyrighted by Utah Valley Gardens unless otherwise attributed. The use of photographs posted on this site without permission is forbidden and is protected by copyright law, as is all original text.

Blogger templates made by AllBlogTools.com

Back to TOP